Setting Up Proper Azure Storage Per Client
Setting Up Azure Storage Correctly Per Client Website
Setting Up Azure Storage Correctly Per Client Website
Setting Up Azure Storage Correctly Per Client Website
The Wrong Wat
When you set it up wrong all of the clients storage can be exposed. See screenshot...
The Correct Way to Setup
To set this up correctly
1. Go to...
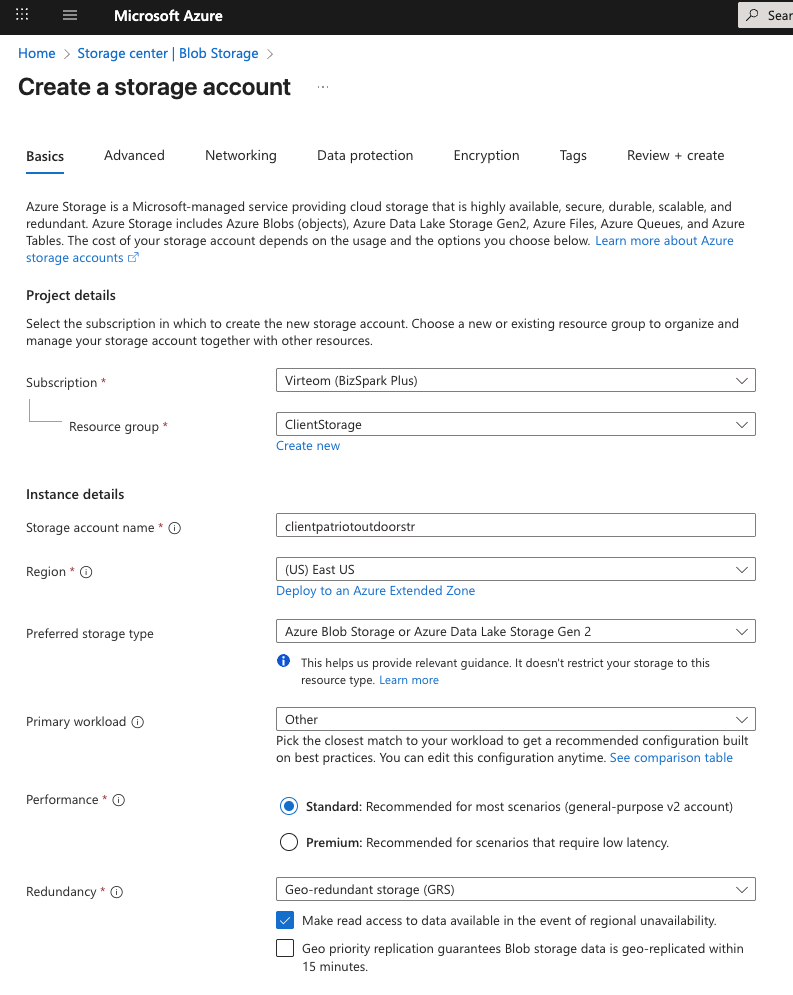
2. Click "Create"
3. Give it a storage name, always start with "client" so example "clientpatriotoutdorrstructures"
Settings should look like this...
4. Click "Review and Create"
5. Click "Create" again after you review one more time. Deployment may take a few minutes.
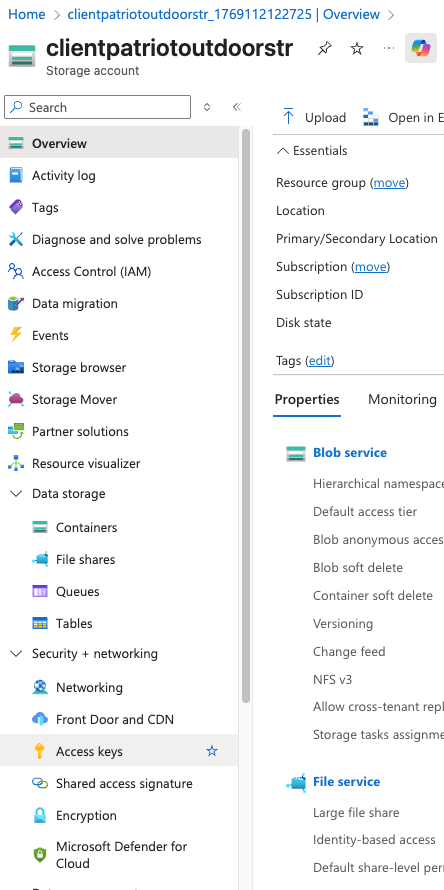
6. When the button appears cliclk "Go to Resource"
7. Go to "Access Keys"
Create New Container in Azure
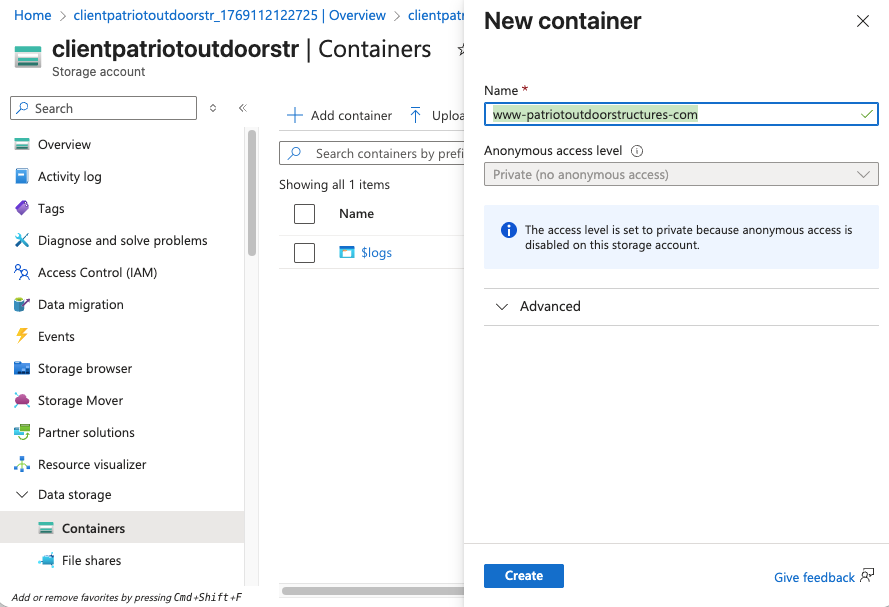
In Azure click on "Containers" and then click "Add Container" And make it the website name such as www-patriotoutdoorstructures-com, then click "create"
Make sure to set the container to the public so that the files are accessible when the website calls for them.
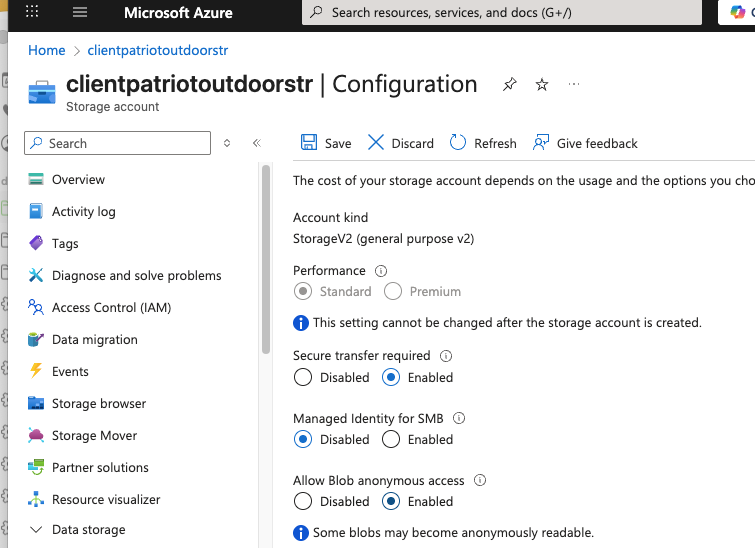
1. At the Storage Account level change acces to allow Anonymous access... Click "Disable" to open settings.
2. Click "Enable" for the Anonymous access. Then Save.
NOTE: THIS MAY TAKE A FEW MINUTES BEFORE YOU CAN DO THE NEXT STEP.
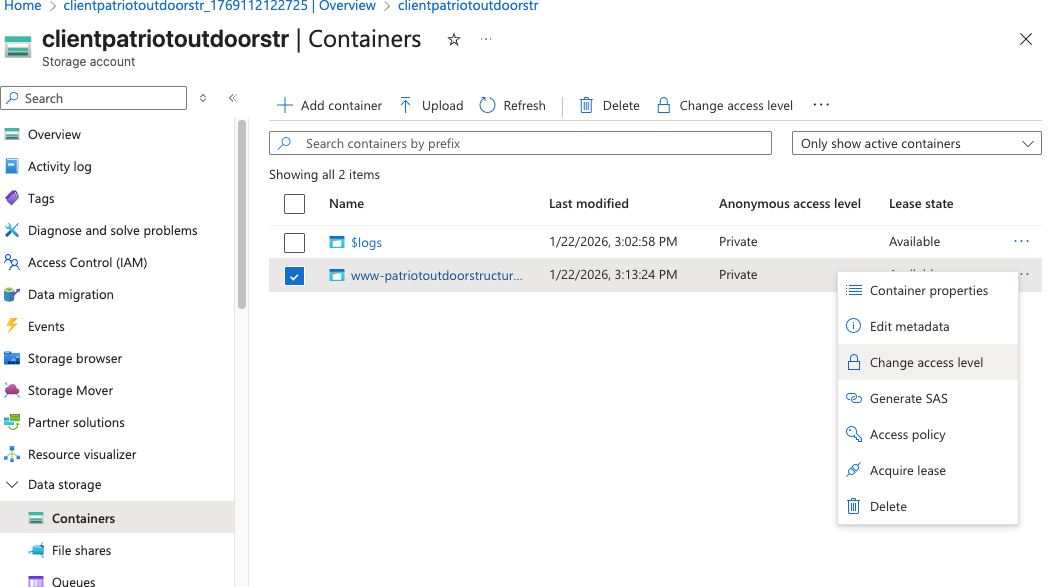
1. In the web portal, under containers, click the three dots next to the container name...
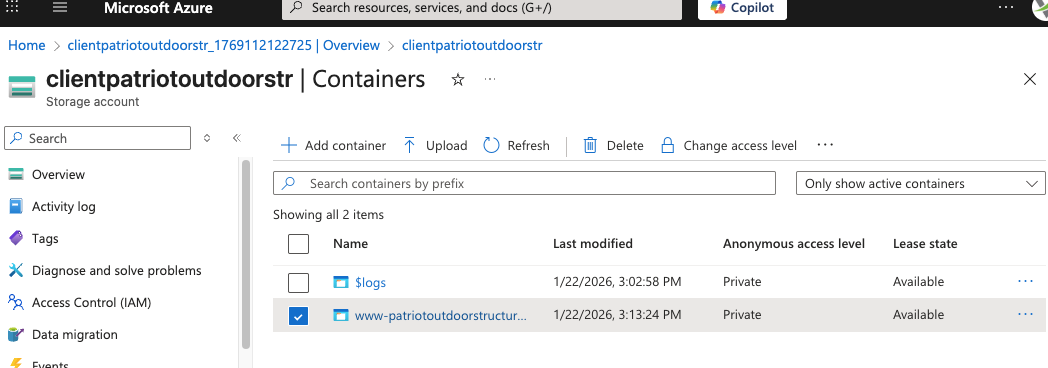
2. Select "Change Access Level"
Installing on Wordpress
1. Make sure to install the Plugin "Microsoft Azure"
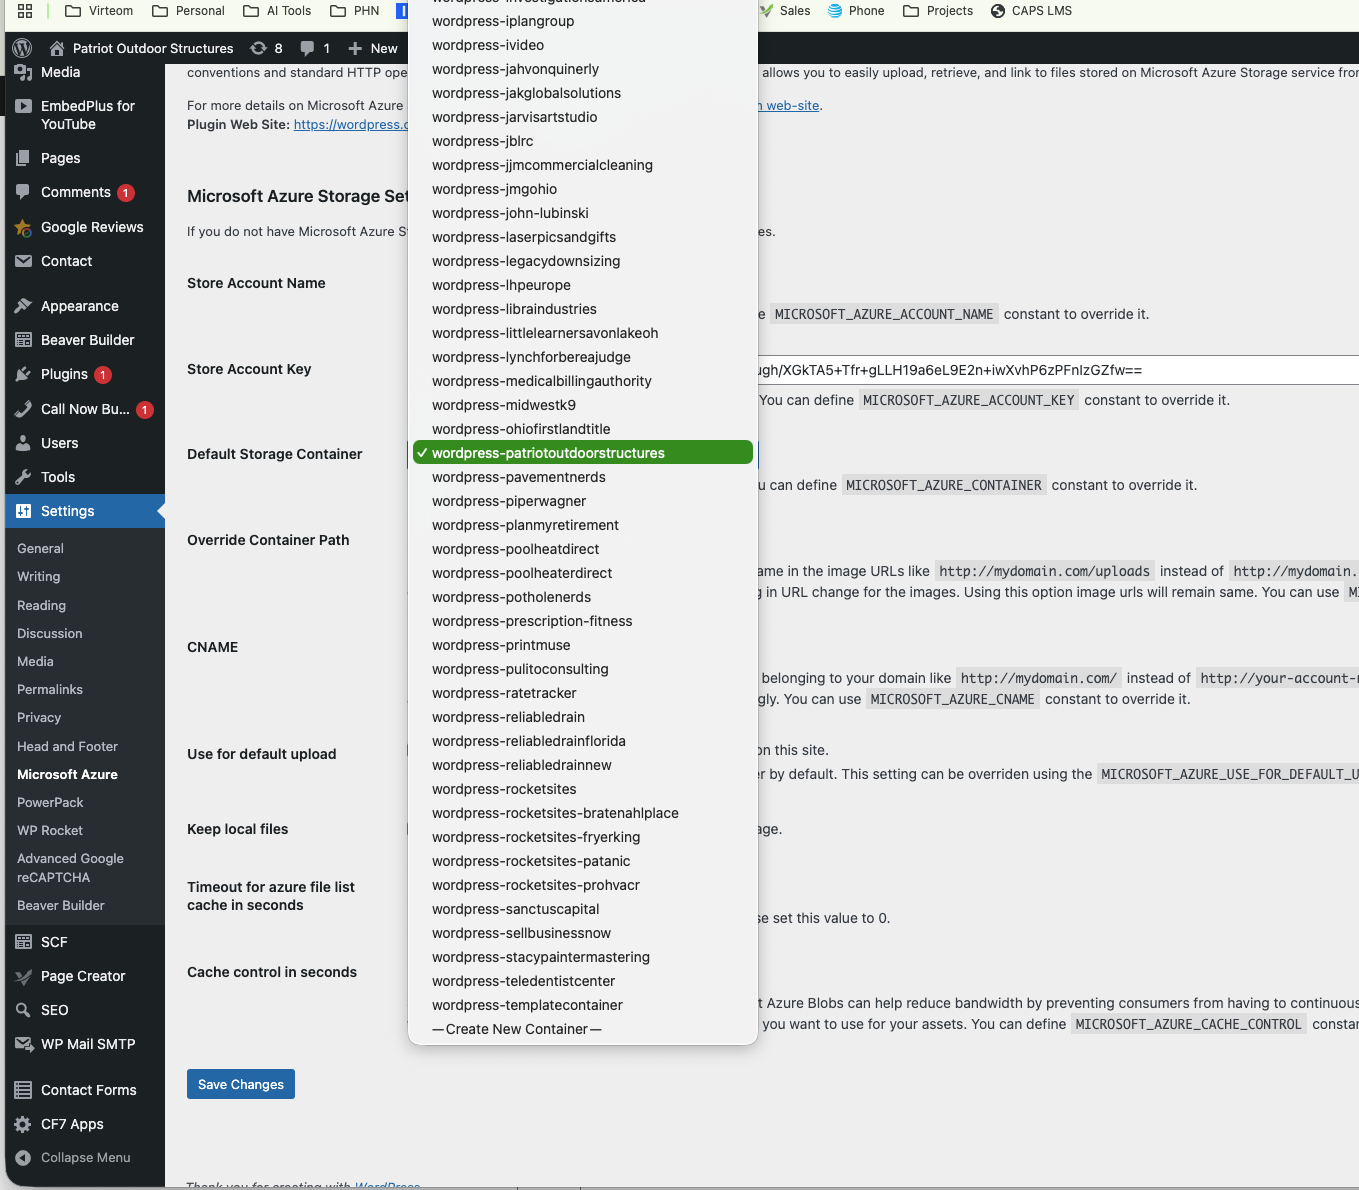
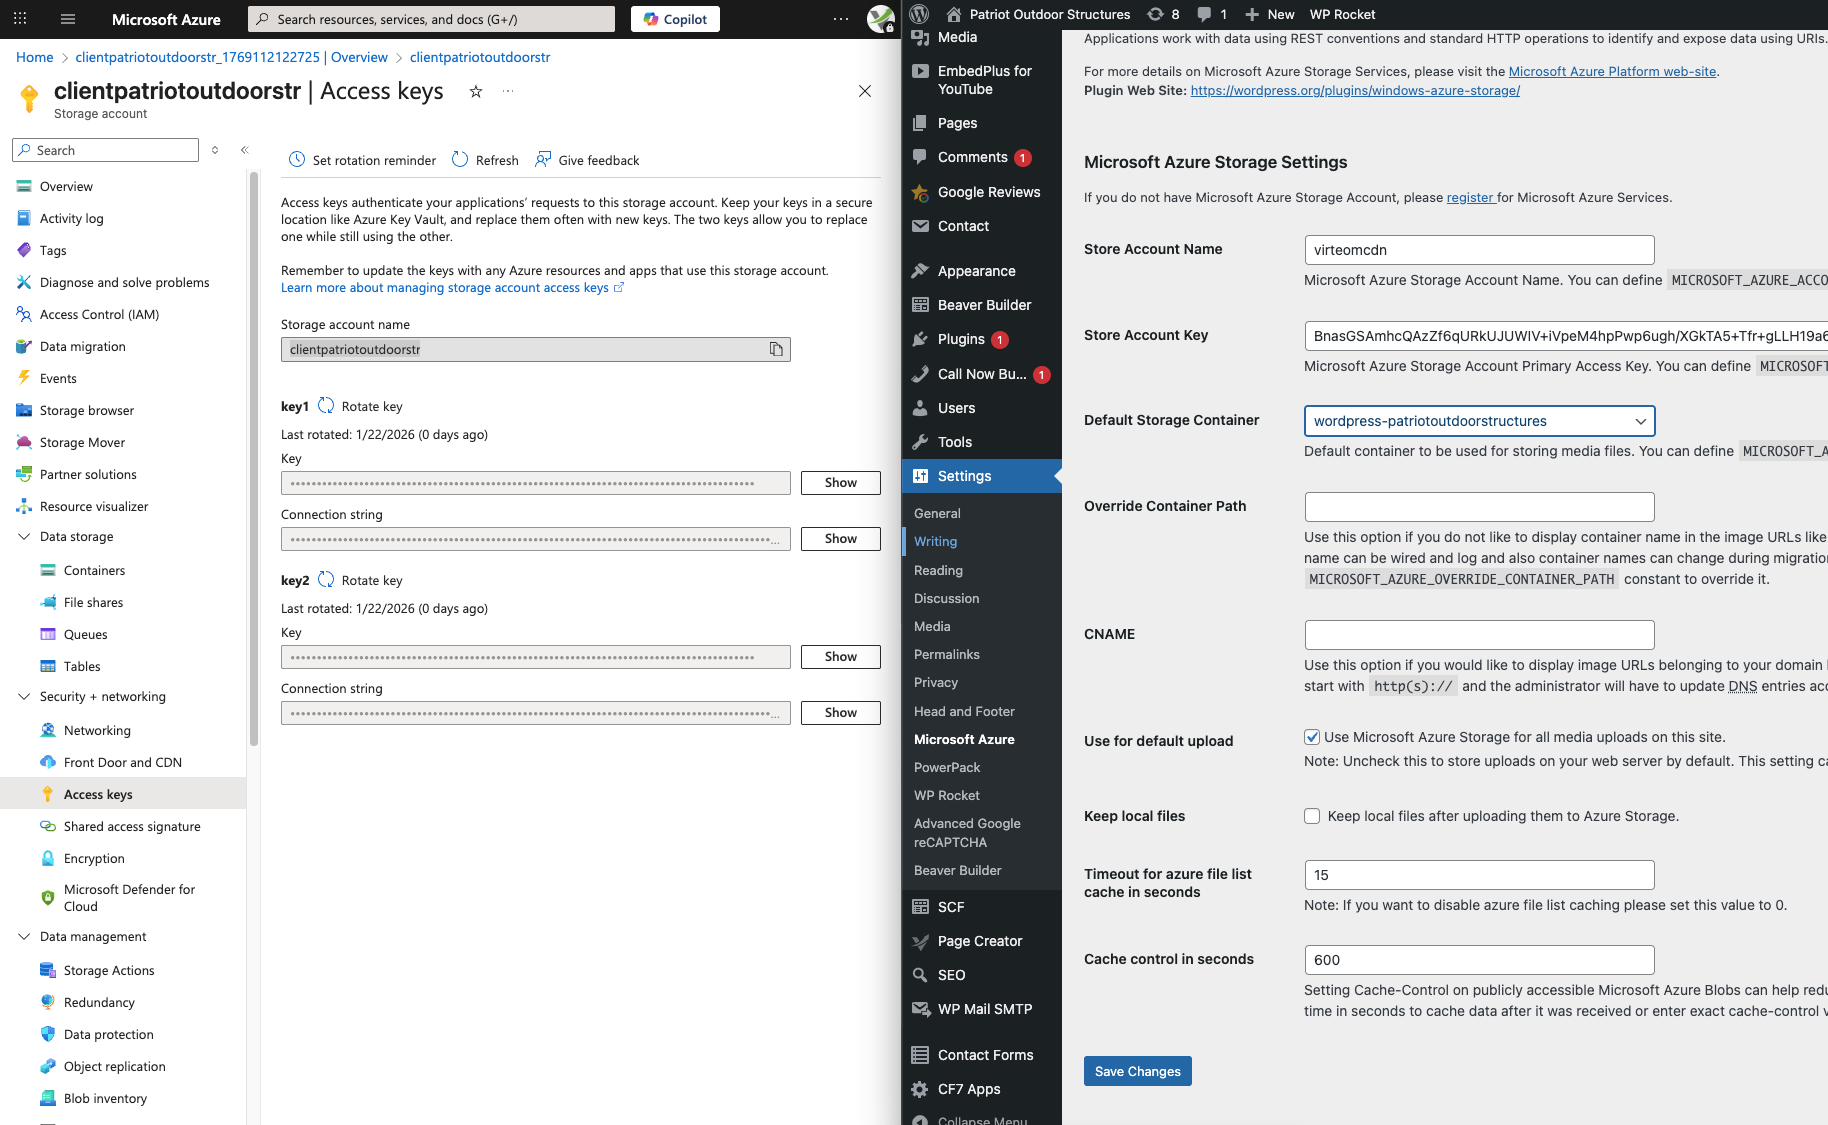
2. If you are securing an already setup Azure Account with Wordpress, look at these two screens side by side. We can see what we need to replace.. We need to replace the Account name from "virteomcdn" with the "clientpatriotoutdoorstr" and then replace the keys with one of the new one. Either key would work.
3. Once you've added the Keys, and Acount name hit "Save".
4. In the dropdown of Wordpress plugin make sure the container you made above is selected and hit save.

Note: If you are doing a migration, make sure you go into Azure File Explorer and download all of the website files from the old storage container and upload them in the exact storage structure they are in so that the site images do not break. You may need to download the database and do a find and replace of the old links to the old azure storage location for images etc. to the new location.
Tip: When you've downloaded all of the website files, open Image Optim, drag all folders into Image Optim and it will optimize and compress all large images in one step. Then upload to new location. Upload each root folder one at a time.