Spooner-PPF Import Instructions
Importing Spooner PPF Files
Importing Spooner PPF Files
Overview
Welcome to the article on importing the Spooner PPF state files. To preface this, if you don't follow these instructions, your in for a world of hurt. :)
Download your PPF file from Google Drive and/or wherever it is saved. Save one ORIGINAL copy, and then do a "SAVE AS" with one with your initals because you are going to need both. I'm doing the below steps on the file that has my initials.
Step 1 - Obtain the File and Prep it for Import
This is probably the most important step. Once you obtain the file, open it in excel and then do a find and replace on the following...
- Find all single quotes and replace with a space = '
- Find all double quotes and replace with a space = "
- Find all commas and replace with a space = ,
The above three steps are the most important.
You will also need to handle the two Zip Code fields that are in the spreadsheet. Both of them are in the format XXXXX-XXXX but need to be separated into two columns, one of 5 and one of 4. You can do this using Excel's "Convert Text to Columns". However, when it does this it overwrites the column to the right of it, it's really odd. So, BEFORE YOU DO THE TEXT TO COLUMNS, create a second tab in the worksheet and copy the column TO THE RIGHT OF the ORIGINAL zip code column. Because this guy is going to get erreoneously overwritten. Make another column next to the original zip code column. Then proceed with your zip code splitting. Once you have two columns, insert a blank column to the right of the +4 Zip code and then paste in your column from your other tab. Then delete your other tab.
NOTE: When you are about to do your text to columns, REFORMAT your new column using this https://support.microsoft.com/en-us/office/keeping-leading-zeros-and-large-numbers-1bf7b935-36e1-4985-842f-5dfa51f85fe7#:~:text=Use%20a%20custom%20format%20to,contain%20fewer%20than%2016%20digits. so that way the leading 0's stay, otherwise you'll have some numbers with no 0 and that isn't right.
Don't forget there are TWO columns with Zip Code (Zip Code and then Business Zip Code) So you end up doing this process twice.
Step 2 - Prepare for Data Mapping
Datamapping is simply matching the columns in your excel spreadsheet with the columns in the database. As of 2022, the below map represents the datamap that worked for importing. The labels that have square brackets around them are the database column names, example [policy_number] is the name of the database column and => Policy Number is the column name in my spreadsheet. Use the below to remove any columns that aren't needed to match up to this. That should make it simple. In short... If you have more column names in the CMS than the ones in your spreadsheet, remove them from the excel spreadsheet. If, once you map, the bottom area has white entries (not all green) the import will not work. If you see "Choose One" that means you don't have a column for it and leave it blank.
Items of Note: The "2022 Employer Program" is all the way at the bottom of this map even though it's in the middle of the spreadsheet, do not erroneously delete it. You may end up having to import and data map a few times to find the correct columns in the spreadsheet to delete.
[year] => 2022
    [policy_number] => Policy Number
    [business_sequence_number] => Choose One...
    [primary_name] => Primary Name
    [primary_dba_name] => Primary DBA Name
    [address1] => Street Address Line 1
    [address2] => Street Address Line 2
    [city] => City Name
    [state] => State Code
    [zipcode] => Zip Code
    [zip_plus_four] => Zip-Second
    [county] => County Name
    [county_description] => County Name
    [business_area_code] => Choose One...
    [business_phone] => Business Phone
    [business_extension] => Business Extension
    [fax_area_code] => Choose One...
    [fax_phone] => Business Fax
    [fax_extension] => Fax Extension
    [business_contact_first_name] => Business Contact Name
    [business_contact_middle_initial] => Intrastate Retrospective Rating Flag
    [business_contact_last_name] => Choose One...
    [business_address1] => Business Street Address 1
    [business_address2] => Business Street Address 2
    [business_city] => Business City
    [business_state] => Business State Code
    [business_zipcode5] => Business Zip Code
    [business_zipcode4] => Choose One...
    [policy_original_effective_date] => Policy Original Effective Date
    [current_risk_type] => Policy Type
    [coverage_status_code] => Policy Status
    [coverage_status_effective_date] => Status Reason Effective Date
    [employer_rating_plan] => Group Experience Rated Program
    [risk_group_number] => Risk Group Number
    [experience_rate] => 2022 EMR
    [employer_rep_GRC] => Employer Rep GROUP RISK/CLAIM
    [employer_rep_RC] => Employer Rep EMPLR RISK/CLAIM
    [employer_rep_RM] => Employer Rep RISK MANAGEMENT
    [employer_rep_id] => Choose One...
    [current_industry_number] => Current Industry Number
    [current_industry_description] => Current Industry Description
    [mco_id_number] => MCO ID Number
    [mco_name] => MCO Name
    [mco_relationship_beginning_date] => MCO Relationship Beginning Date
    [premium_range] => 2022 Premium Range
    [group_rating_flag] => Group Rating Flag
    [group_retro_flag] => Group Retro Flag
    [individual_retro_flag] => Individual Retro Flag
    [one_claim_program_flag] => One Claim Program Flag
    [em_cap_flag] => EM Cap Flag
    [dfsp_flag] => Drug Free Safety Program Flag
    [large_deductible_flag] => Choose One...
    [small_deductible_flag] => Choose One...
    [self_insured_flag] => Choose One...
    [employer_year] => Employer Year
    [grow_ohio_participation_flag] => Grow Ohio Participation Flag
    [business_type] => 2022 Employer Program
    [finished_email] => dan@virteom.com
    [filename] => https://virteomdevcdn.blob.core.windows.net/site-ppf-spoonerinc-com/uploaded_media/ppf_spoonerinc_com/Modules/glmod_Spooner-Inc_Import/2022-import__1667610833.csv
    [filepath] => glmod_Spooner-Inc_Import
    [delimiter] => comma
    [fname] => start
Step 3 - Save This File as a CSV
Simply click on "save as" in excel and save this file as a windows csv file. Give the file a name that you'll remember such as 2022-full-data-import. There's a reason to use the word "full" in your name. So please just add that word in your name now.
Step 4 - Save a Template File
Now we want to save a template file. This is simply doing a save as with the file above. But before we do that I want you to delete all the data except for the header titles and one single row of data. The reason for this is because we'll be uploading this file to create a data map template for the importing process and the web portal cannot handle the entire file and hundreds of thousands of records to create the data map template record. Should look something like this...
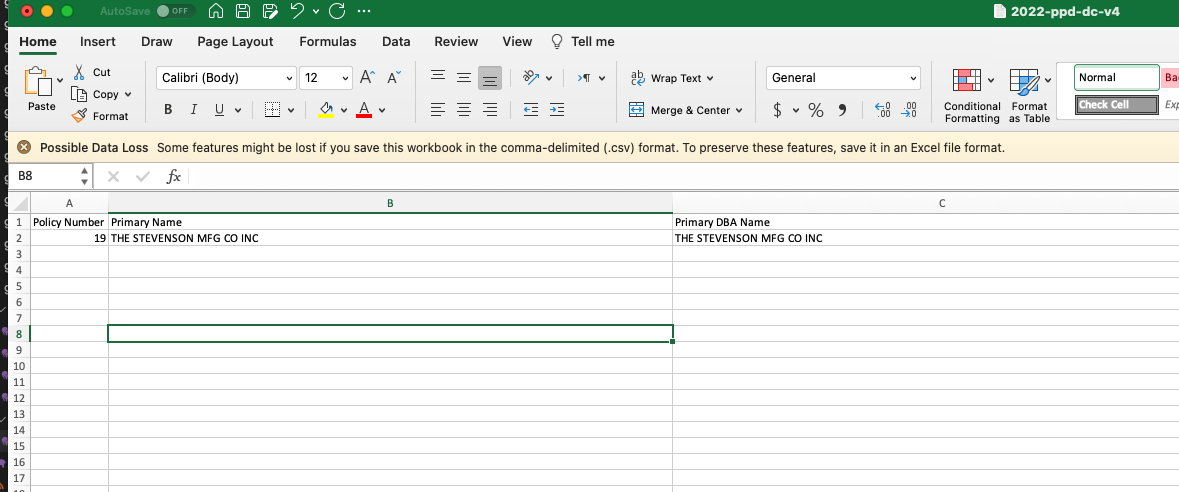
Give this file a name like 2022-import-dc.csv
Import the Template
Now we'll import the template... I'm not going to sugar coat this, this isn't easy.
Go to http://ppf.spoonerinc.com and login. Use 1Password to get the login.
Navigate to this area. See screenshot below...
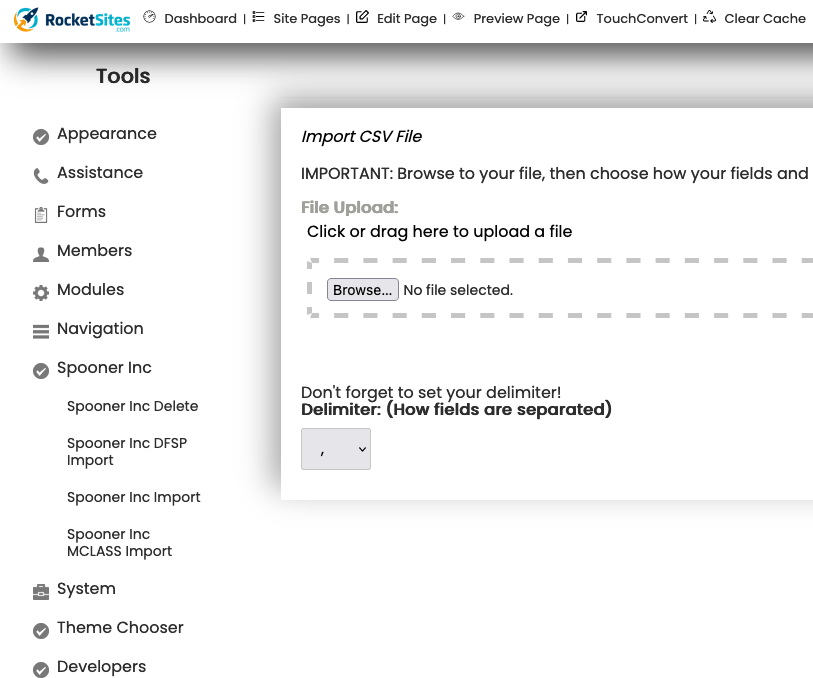
Click the "Browse" button and then save. Make sure you are only uploading the template file and not the full file.
Once the file is completely uploaded the file should have been named with a timestamp on the end. You'll want to rename your full file to the exact name of this file...
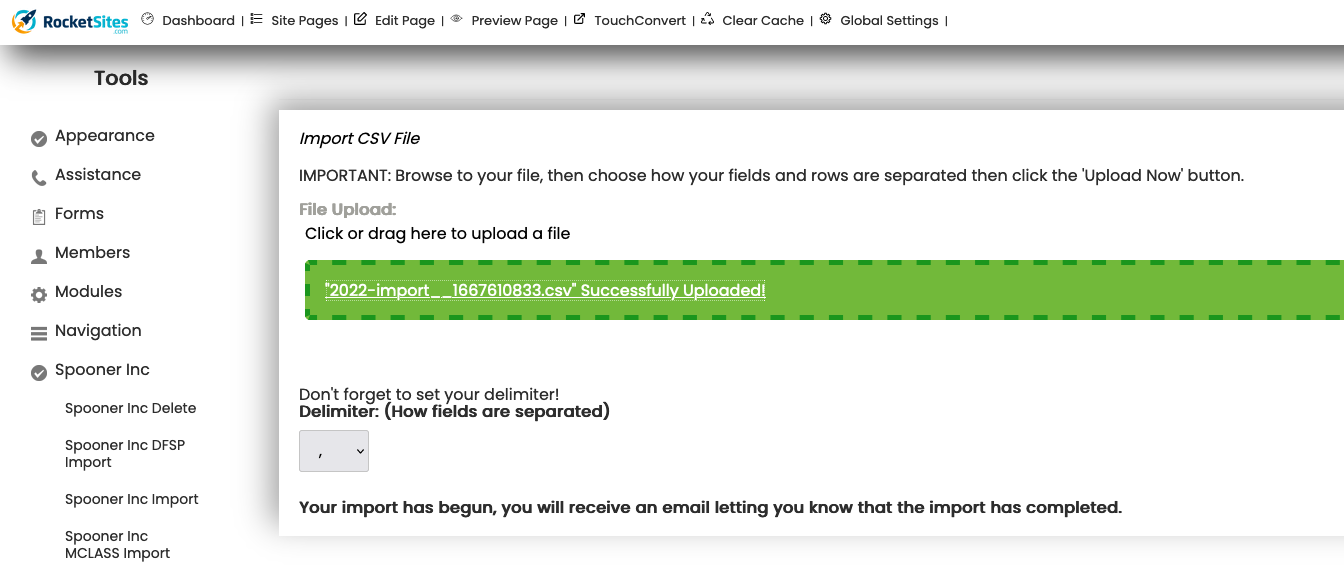
Now what's happening is the system is going to import that single record. We'll tell you what to do to take care of that next.
Open Azure File Explorer
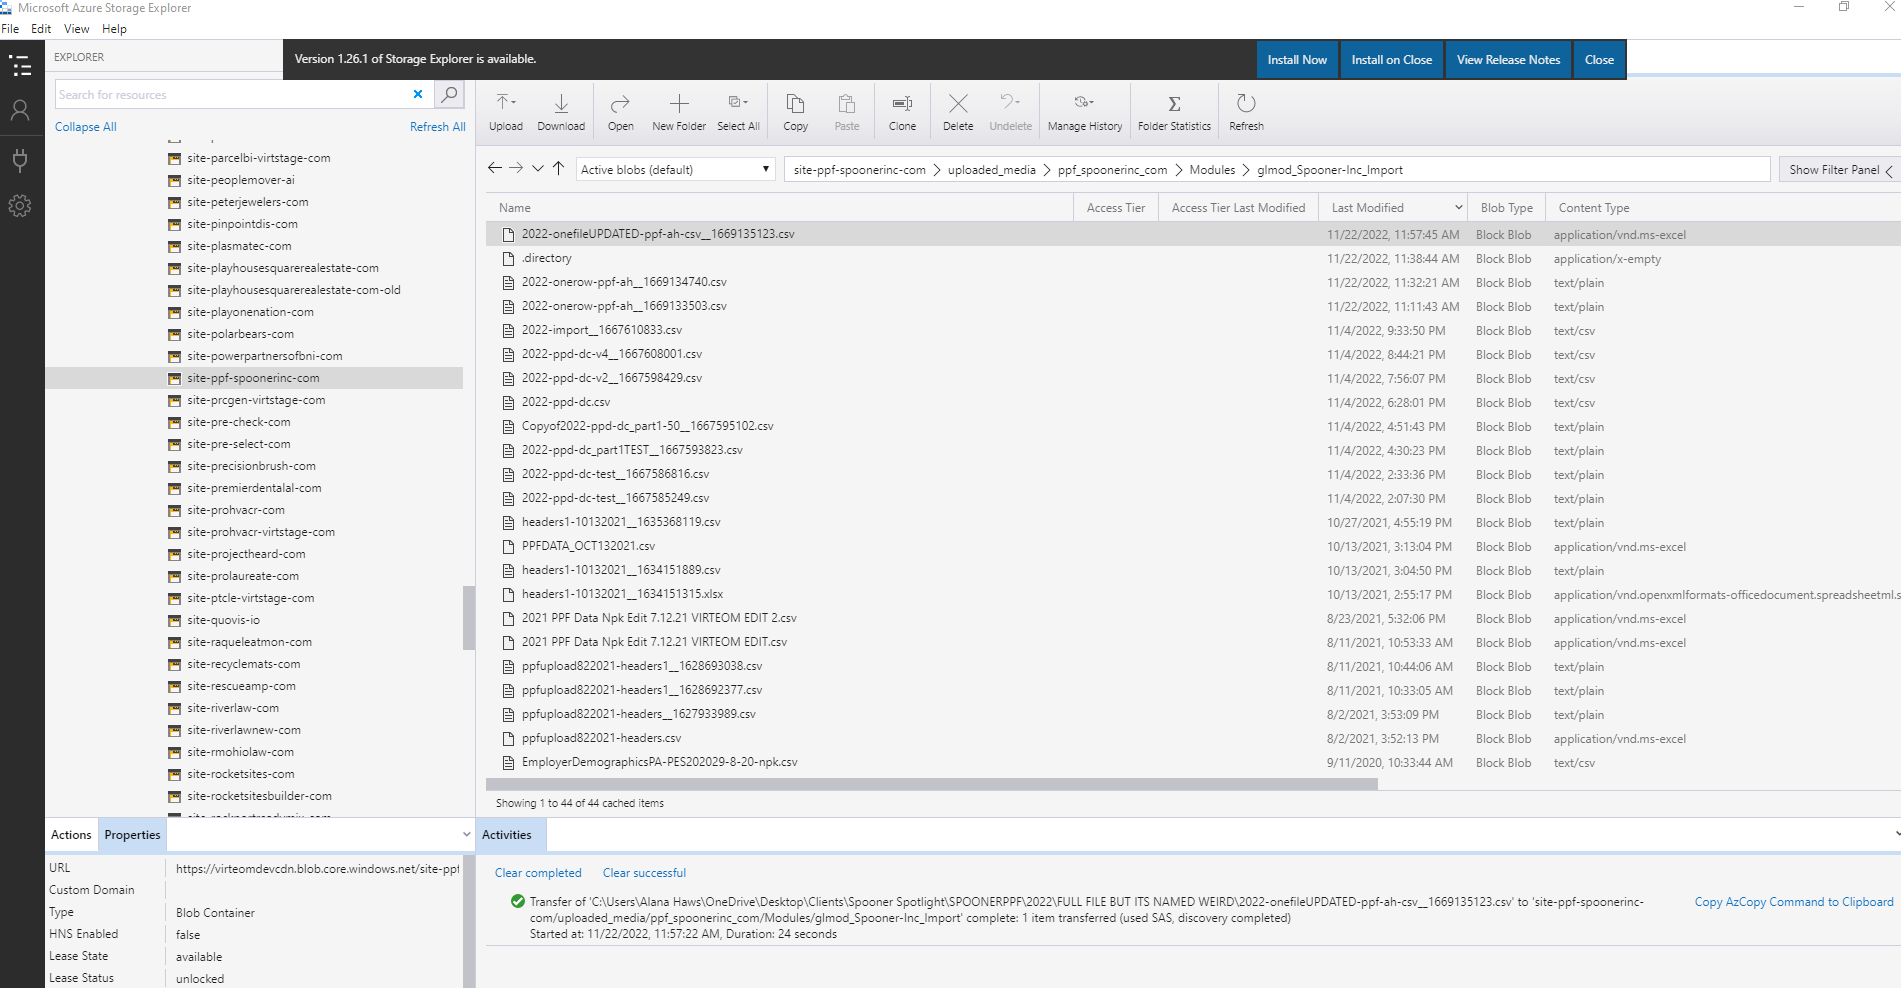
Open Azure file explorer and navigate to the file that was just uploaded and replace it with the full data file and MAKE SURE you are overwriting the single record file with the full records file and name it exactly as it is above in the green box. To get the file location you can click on the file name in the green box and it will tell you it's exact location.
Once that is done let's move on to datamapping.
Data Mapping
In the CMS you should see a data mapping screen similar to this one. Map everything as follows...
This is Alana's file from 2022 (I used some of Chris' stuff from the year before)
This is Dan's file from 2022
Once everything is datamapped, add your email and click "Import"
You may want to have the production database already opened because we're going to have to manipulate a few things to complete this import.
Manupilating the Database for Import
There are three tables we'll be bouncing around too. I suggest using a database client that is local but you can always use the Plesk PHP My Admin as well. In my version I've pinned the three tables so I can bounce around them.
See my tables pinned below. The are
- spooner_imports
- spooner_pec
- sync_module_values
Let's go to spooner_imports table first. If you look at the last record you should see your file "processing" it may even say "complete" if it says "processing" change it to say complete for now.
Now that you have that done. Let's go get rid of any new records that may have been written before we are ready. Since this is year 2022 I am going to delete any records that may have been written before I had loaded the "full" file to Azure CDN.
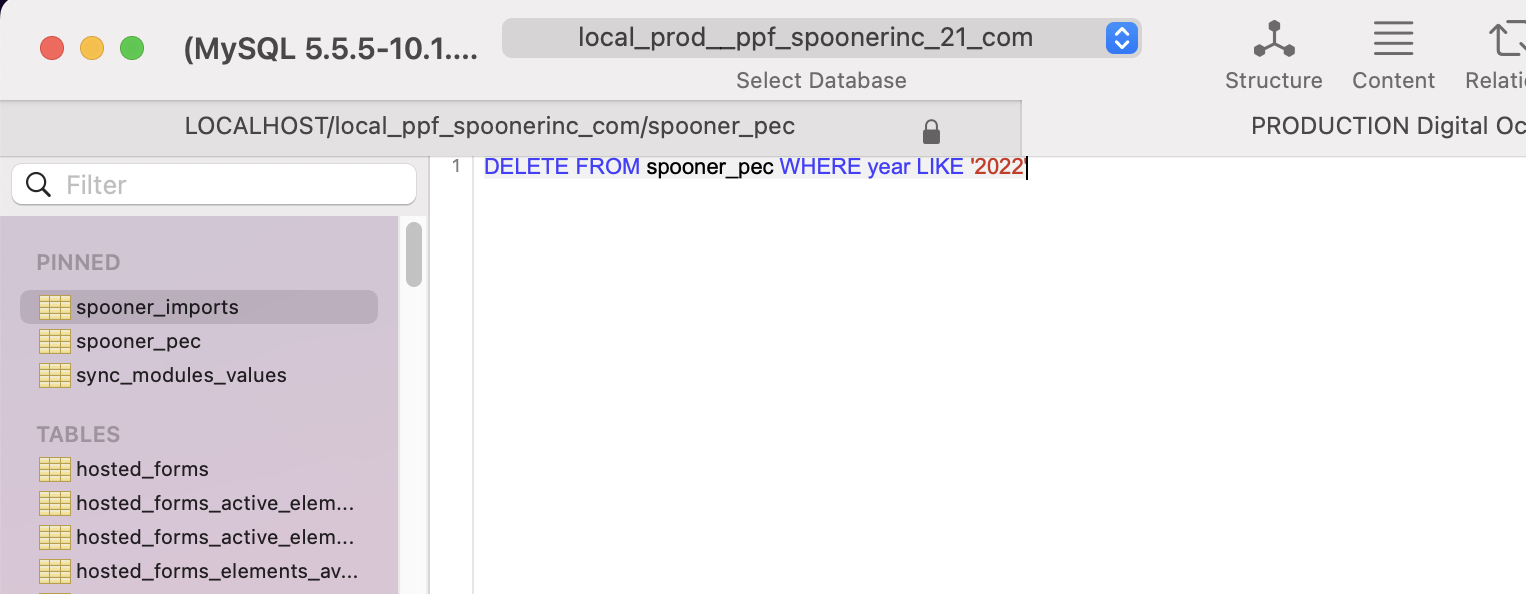
We'll do that by writing this statement in the query window...
DELETE FROM spooner_pec WHERE year LIKE '2022'
Obviously change the above date to your year. See screenshot below for example.
Once you run that query you should have knocked out any records that would then cause duplicates from our final import.
We're actually ready to import now. Before we do. Go ahead and go to the spooner_pec table and sort by year with latest year DESC so you can make sure your year isn't in there just yet. See screenshot below for example. After running the delete statement above, I should not see my year below. In the example below I am demostrating that the year is still in there.. But it should not be.. Once it's not we are ready.
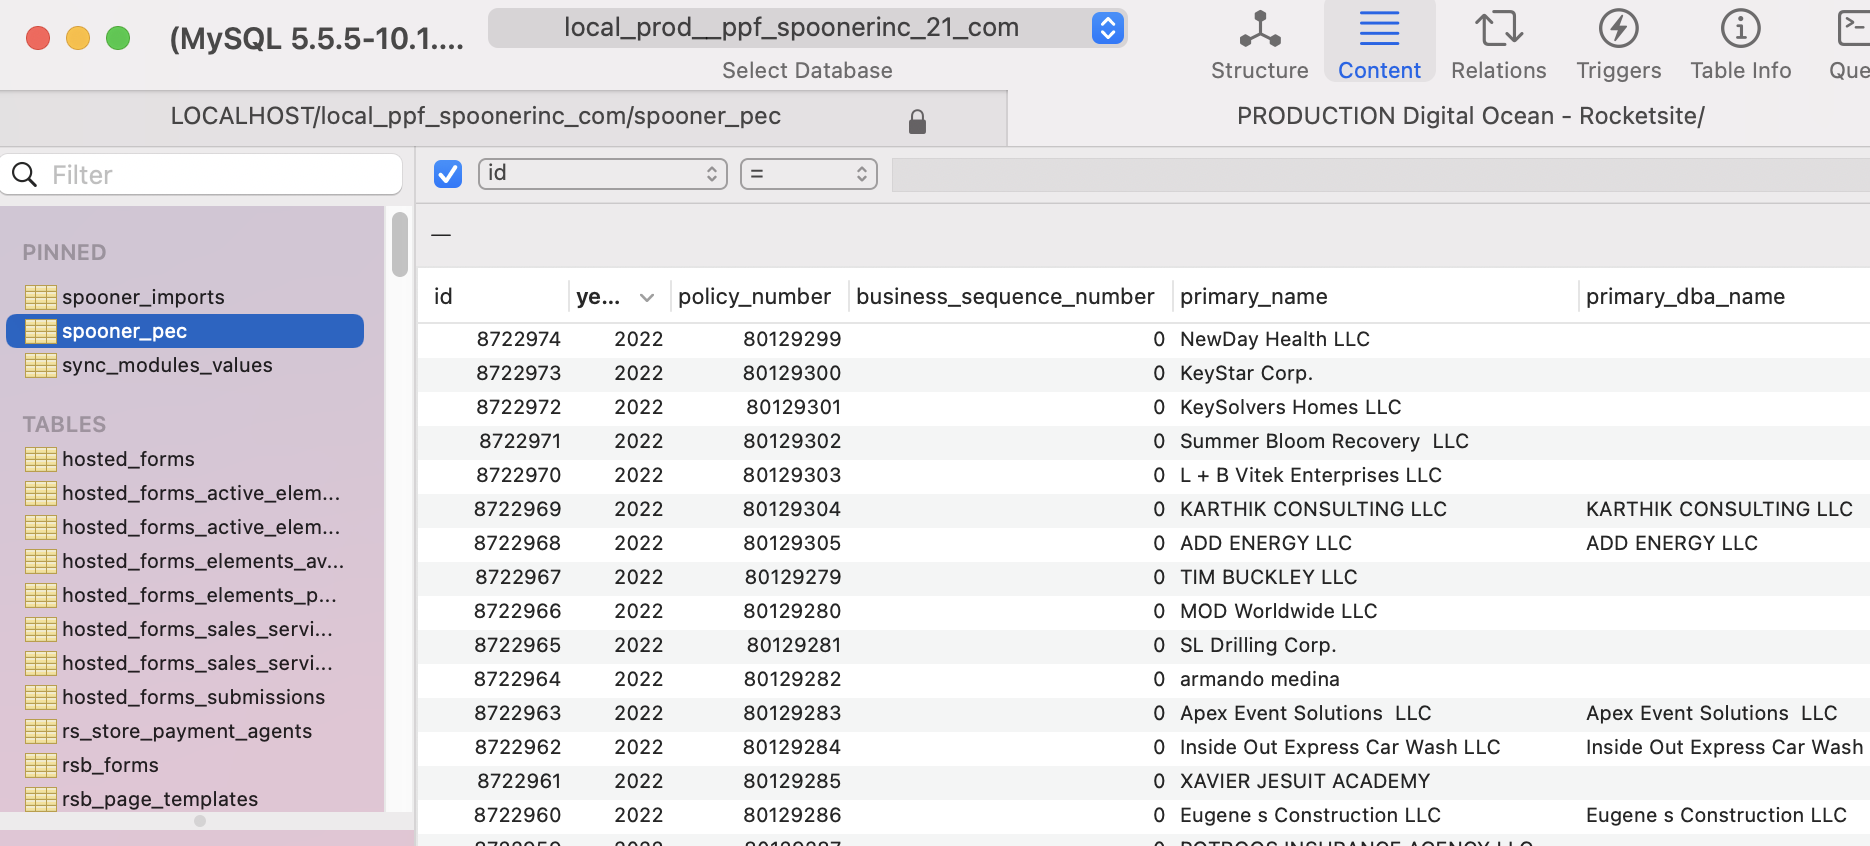
Go back to "spooner_imports" and mark your last record as a status of "pending" This will trigger the cron to run again, but this time on your full file that you replaced with the single record file causing thousands of records to be added. See screenshot for example.
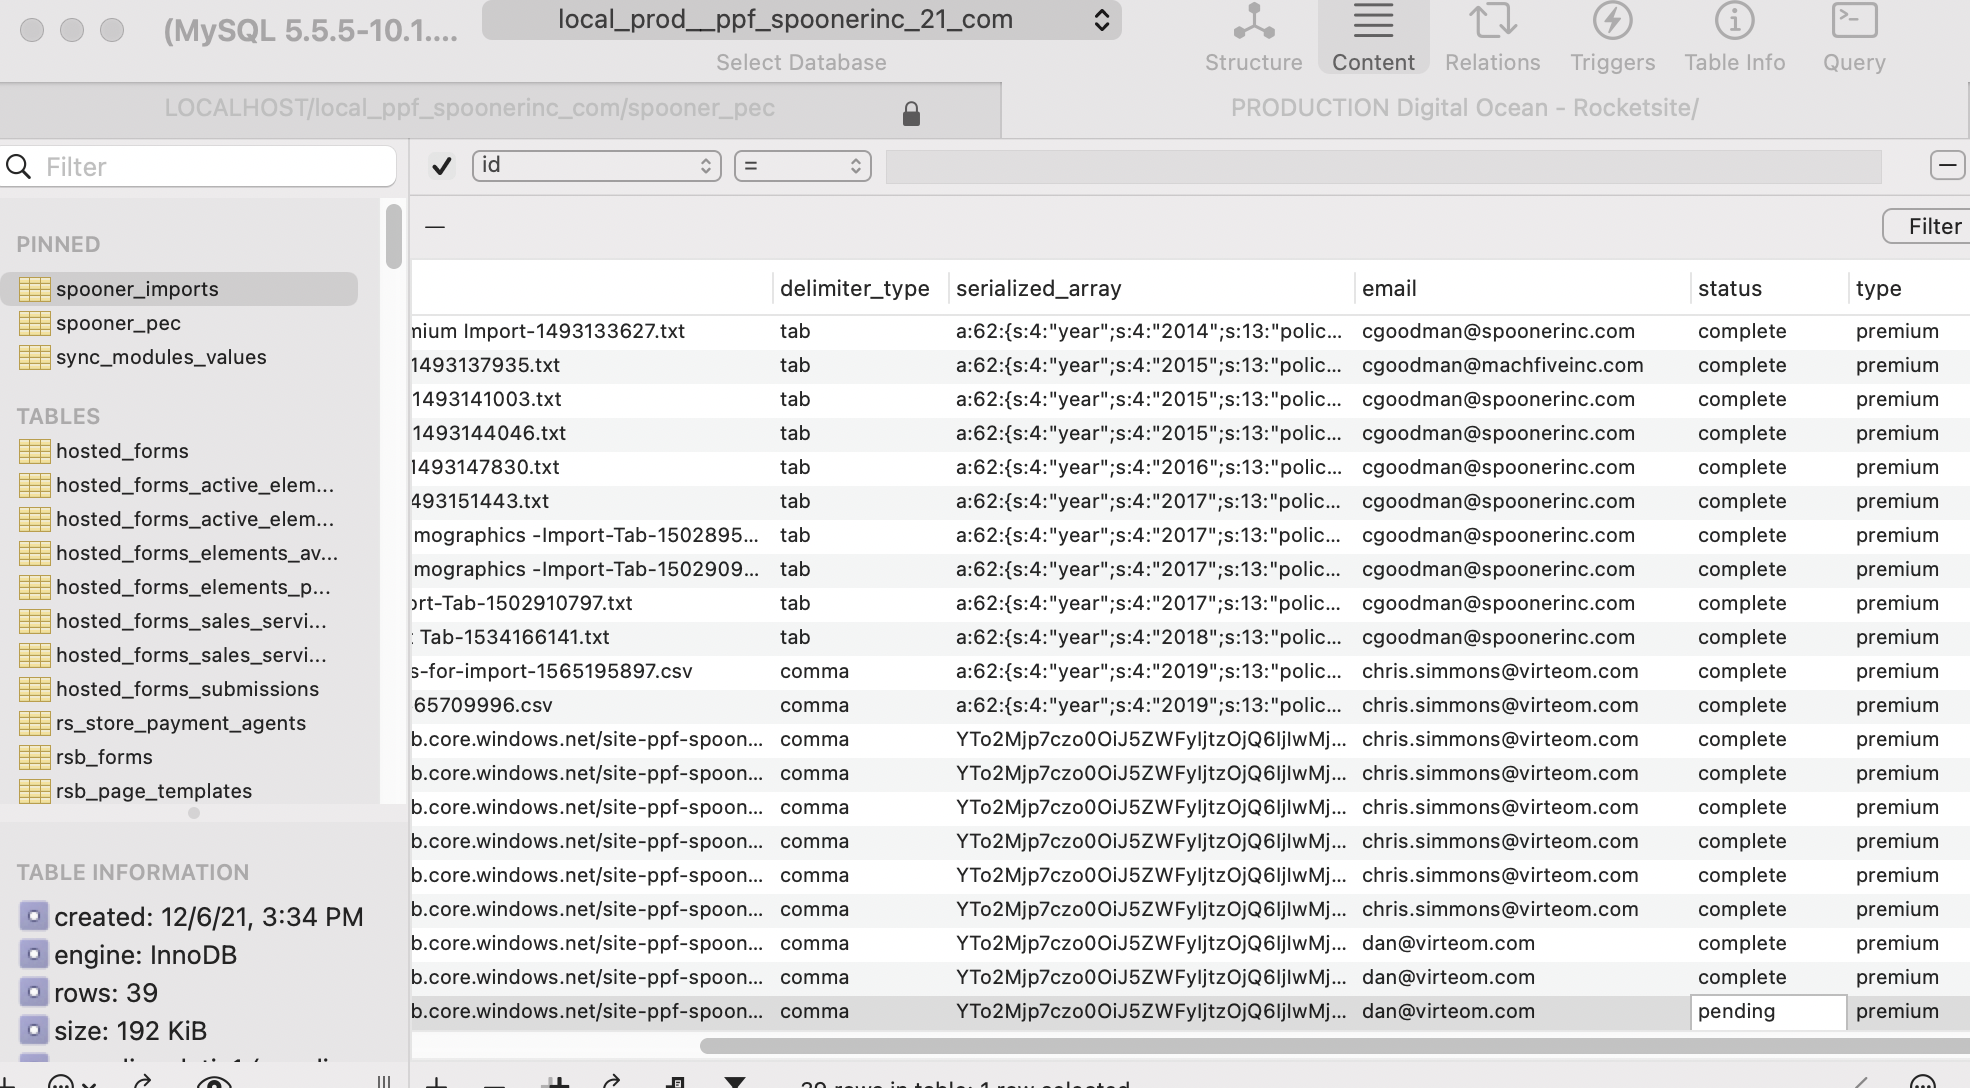
Now if you want to force the cron to run now and not wait for it. You can do that by going to the third table we've pinned "sync_mod_values" and we'll manipulate the cron to trigger...
First in sync_mode_values find the "sub_folder" named "glmod_Spooner-Inc_Import"...

Scroll to the right till you see columns "value5" and "value6" delete both timestamps from your record. This will instantiate the cron to run immediatly on it's next cycle which is every 5 minutes. 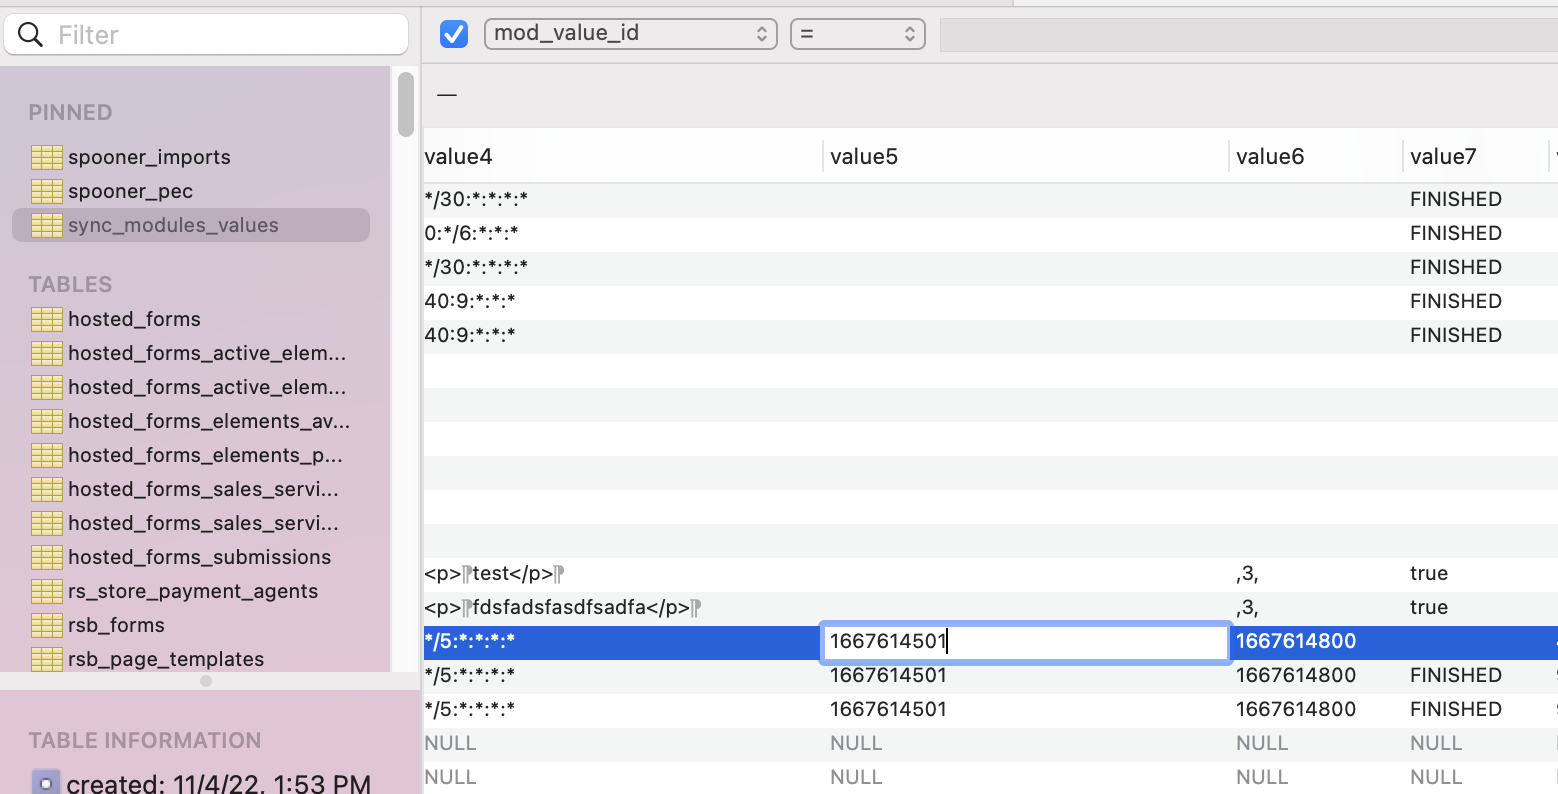
If you don't want to wait for the cron to run, you can manually trigger it to run with the link below. If you made any mistakes and need to keep re-running the cron till you get the import right, just keep deleting the two timestamps above and refreshing the link below will allow you to run the cron in real-time.
https://ppf.spoonerinc.com/virteom/cronscripts/scripts.php
Now check that your import worked. In my test I can see that there is a bucch of 2022 files and I can see that my rows are now 2,422,019 and before my import they were 1,712,202. So almost an additional million records and that's about correct. 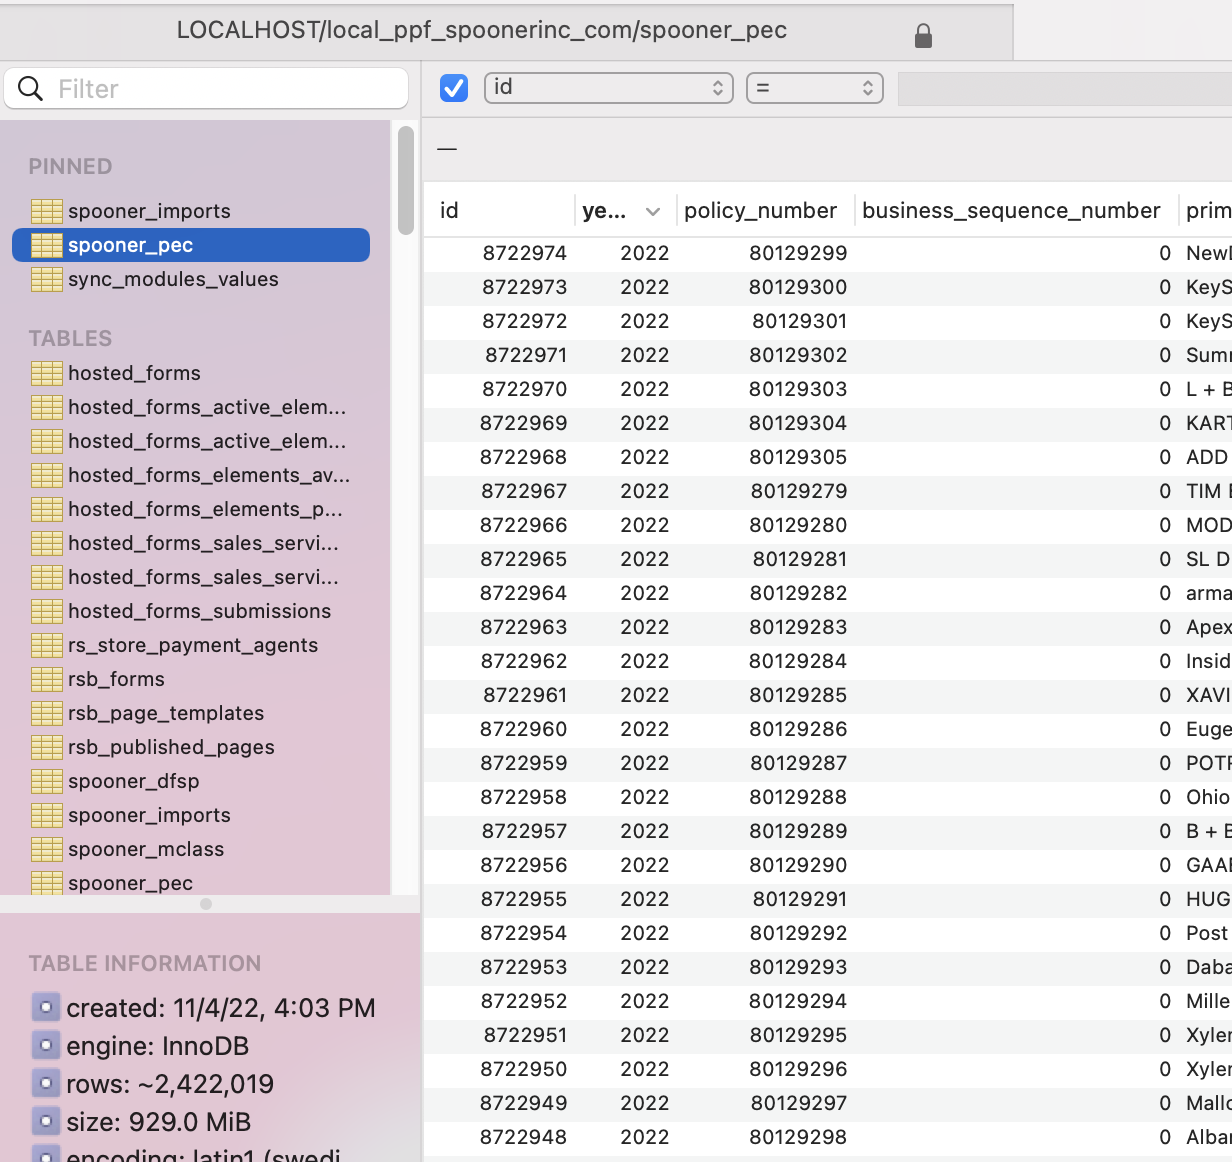
That's it, you've successfully imported Spooner PPF. See you next year to do this bullshit all over again. ;)